ℹ️
This walkthrough covers the
Inspection type (checklist-based, US-style), using the ASME A17.1 standard as an example. If your organization uses Audit inspections, see the
Audit Walkthrough. Click any screenshot to enlarge it.
1. Create Project
2. Schedule
3. Start
4. Select Unit
5. Building & Unit
6. Checklist
7. Sign-Off
8. Review
9. Submit
The inspection process begins with creating a project in the Project Management section. A project ties together the client, building, site, inspection type, and work order details.
Navigate to Project Management → + Create Project and fill in all required fields: client, project name, building, site, inspection type, and work order received date.
Create Project form
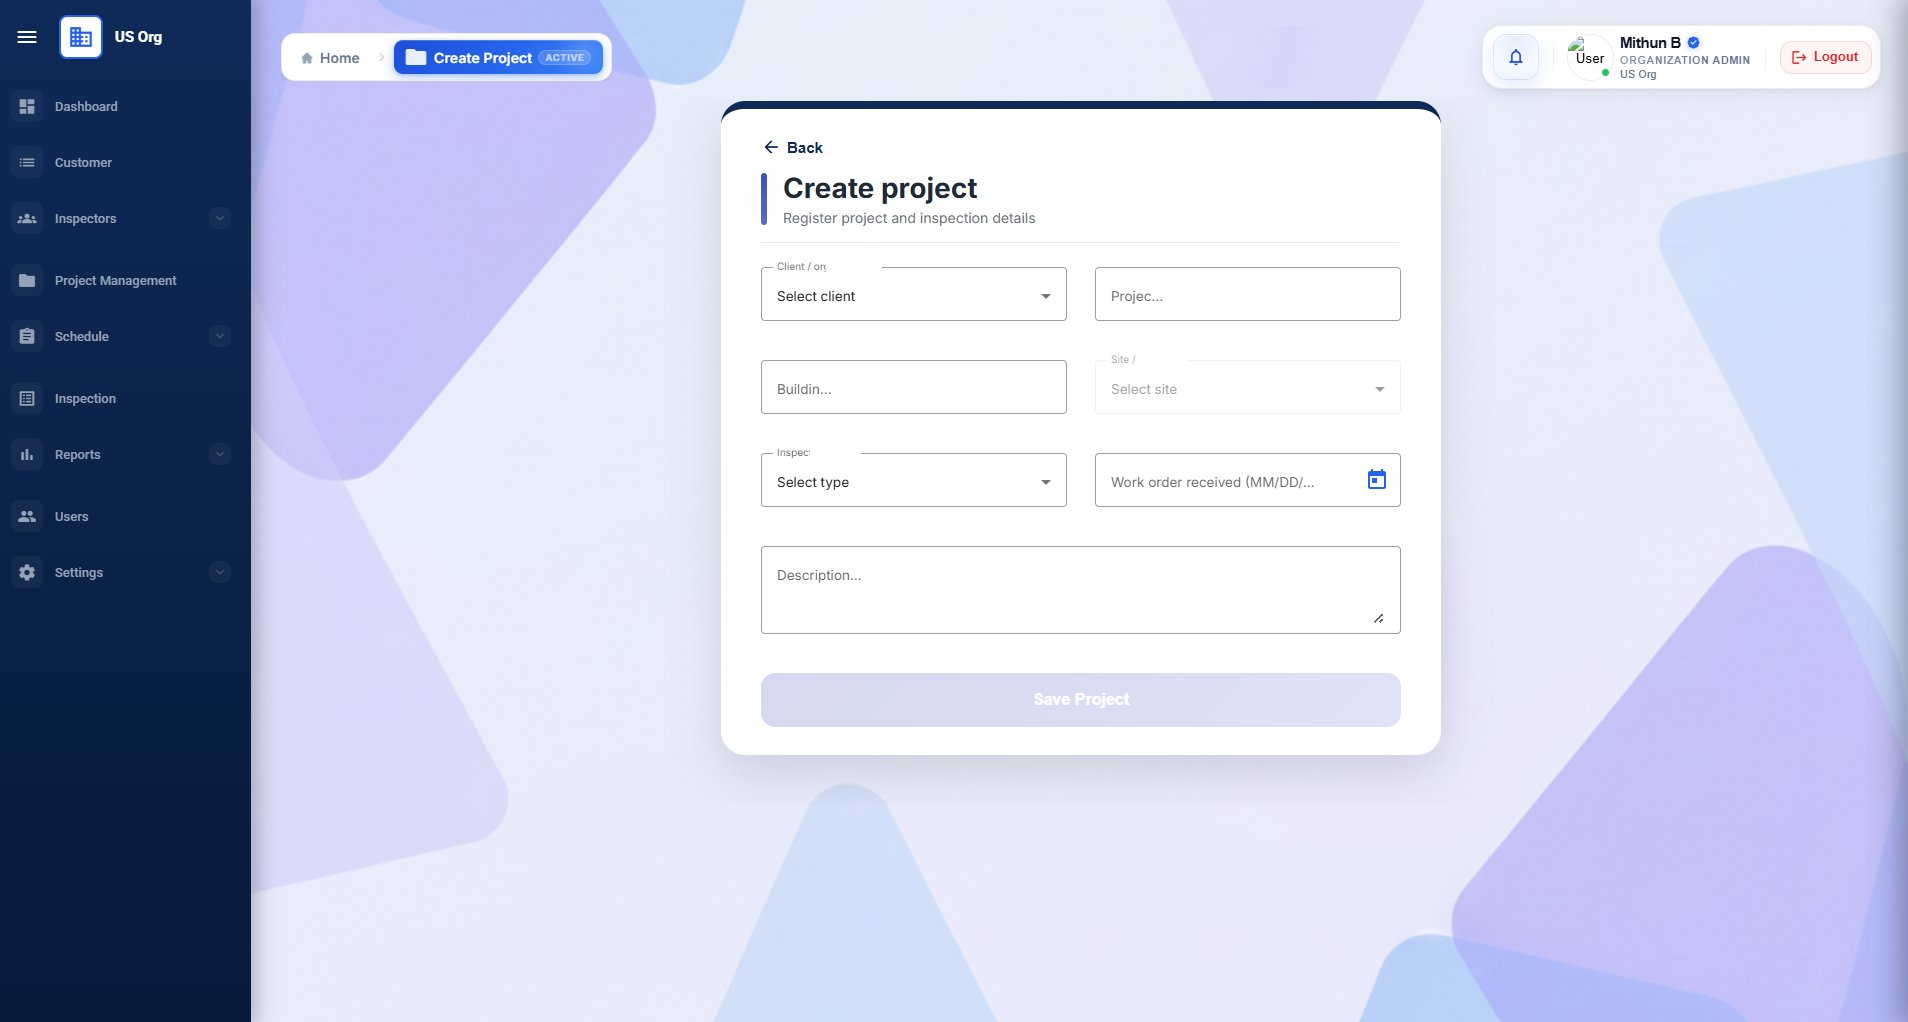
Fill in the Client, Project Name, Building, Site, Inspection Type, and Work Order Received date. Click Save Project when complete.
Project Management list
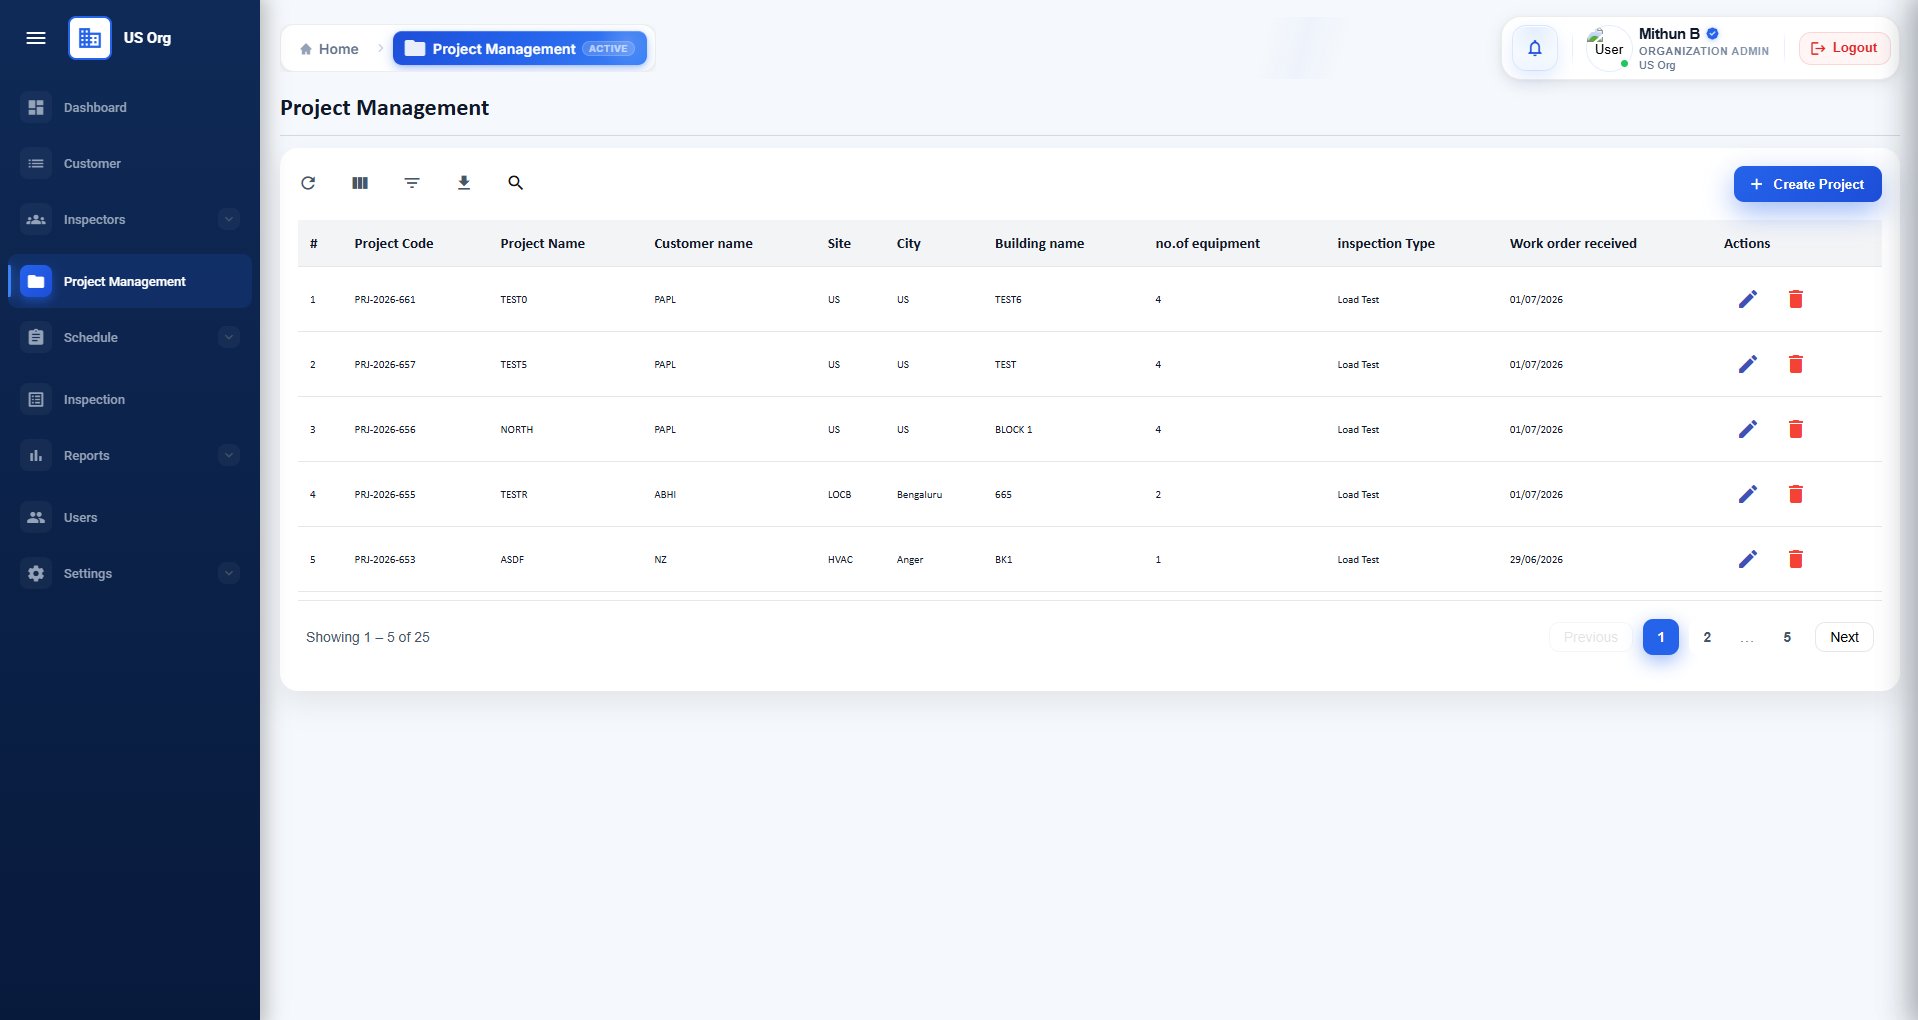
Once saved, the project appears in the Project Management list with its assigned project code (e.g. PRJ-2026-661). You can edit or delete projects from the Actions column.
Once the project is created, schedule the inspection by assigning an inspector and selecting a date and time slot from the availability calendar.
Go to Schedule → Schedule Inspection, select the project, choose the inspector type, and pick an available slot on the calendar.
Schedule Inspection — calendar view
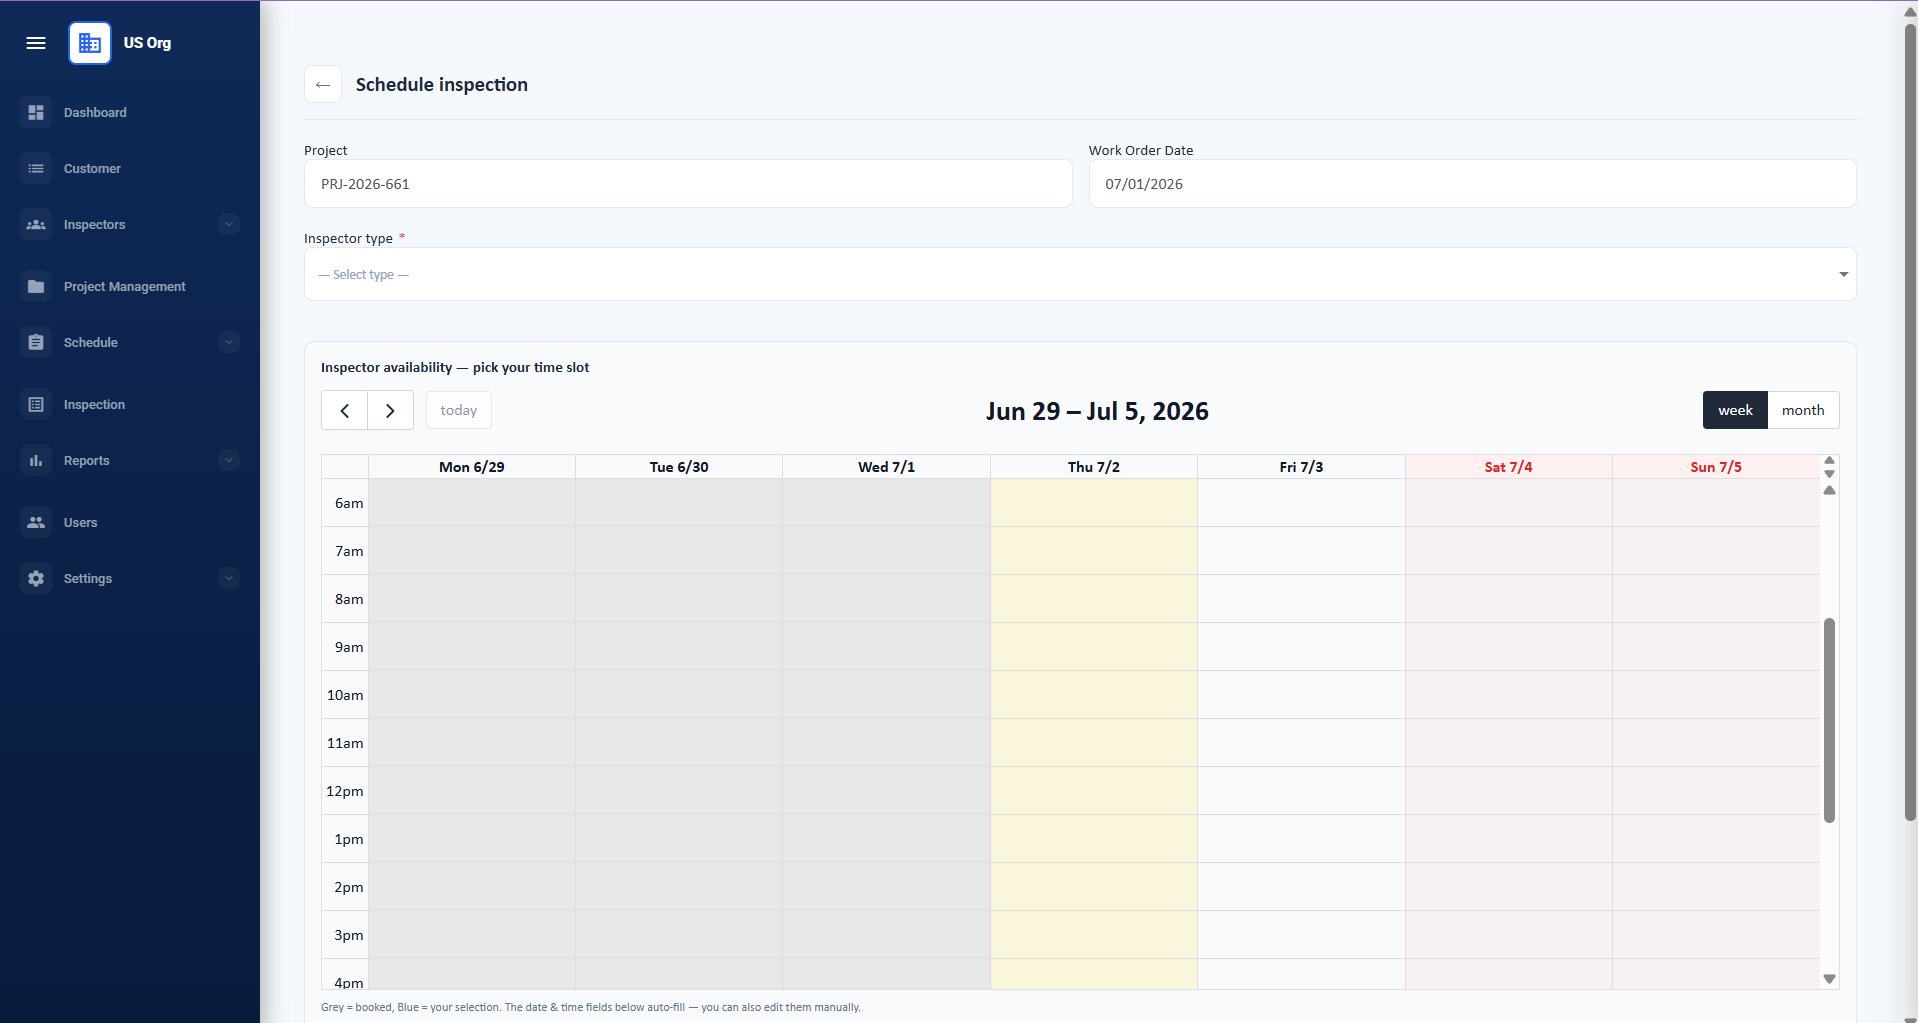
Select the Project and Inspector Type. The calendar shows weekly availability — grey slots are already booked. Click any open slot on the inspector's available day to select your time.
Confirm and schedule
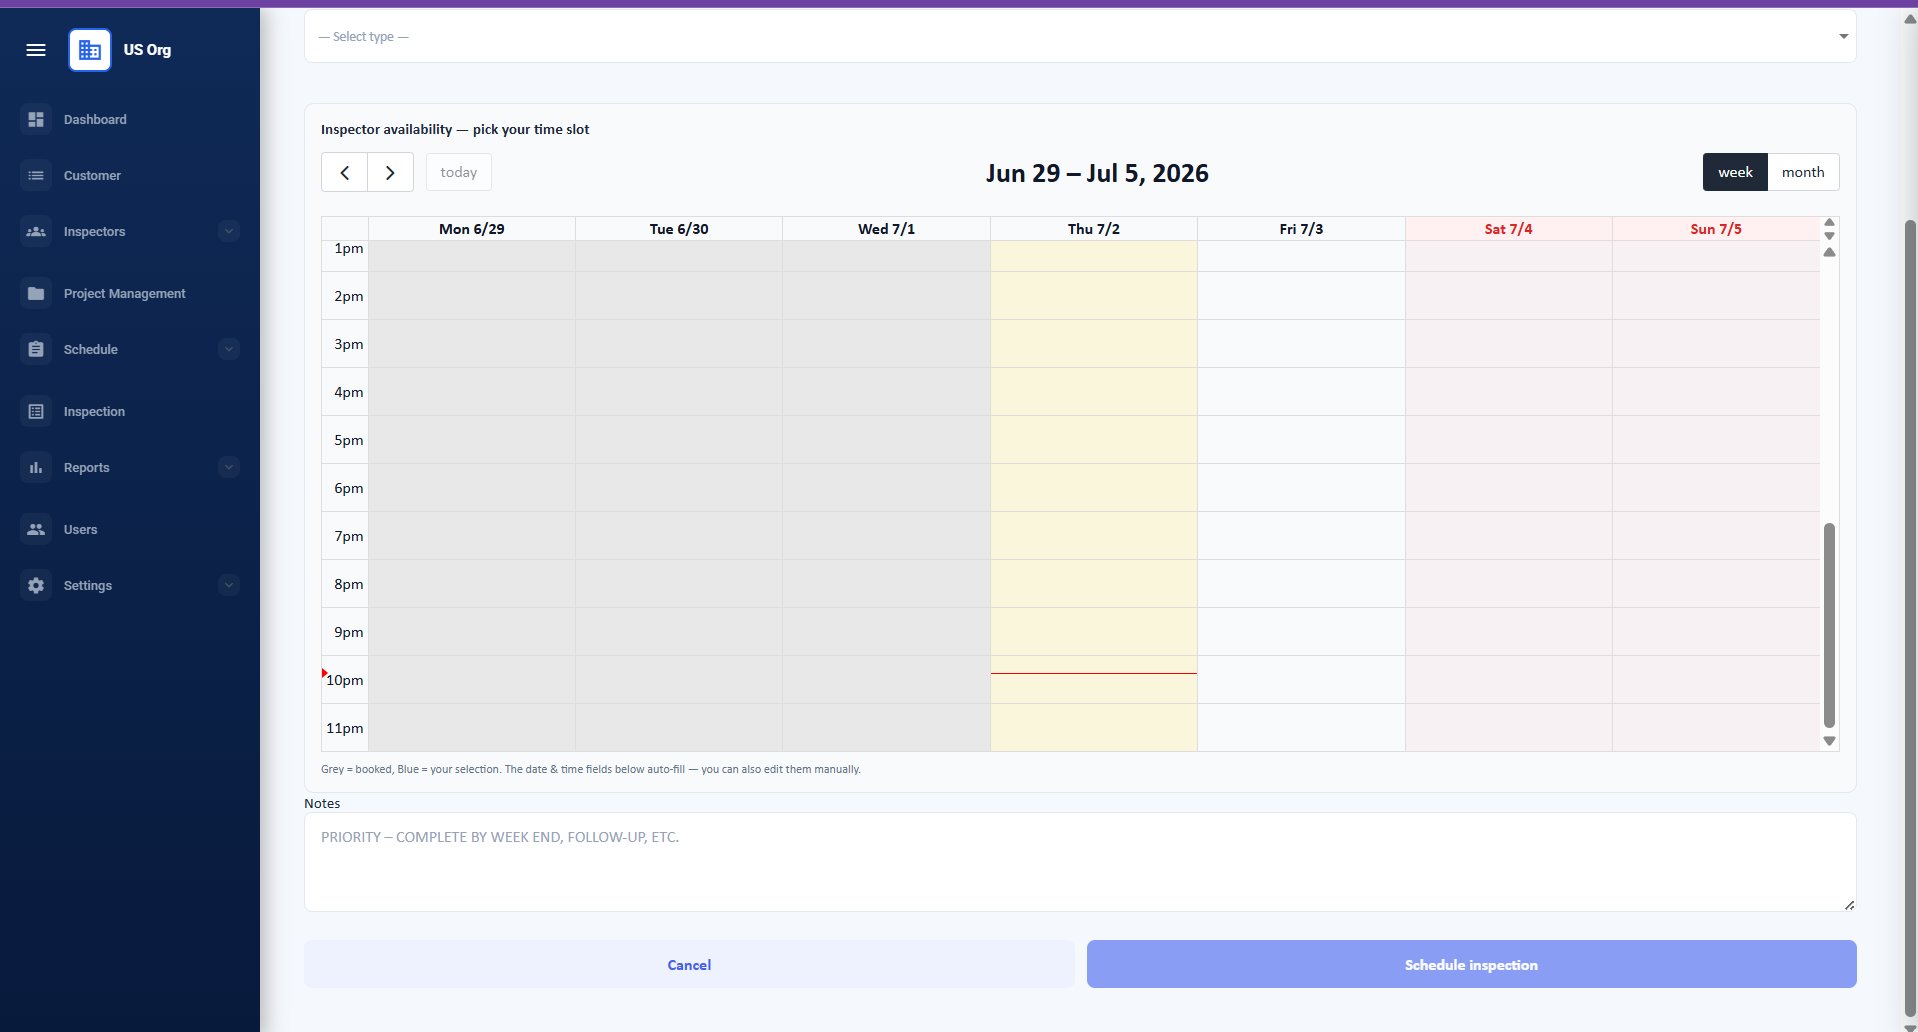
Add any priority notes (e.g. "complete by week end") in the Notes field, then click Schedule Inspection to confirm the booking.
On the day of the inspection, open the Inspection section to see your assigned inspections. Each entry shows the reference number, project code, mode (Onsite/Remote), steps completed, scheduled time, and current status.
Click Start next to your assigned inspection to begin.
Inspection queue
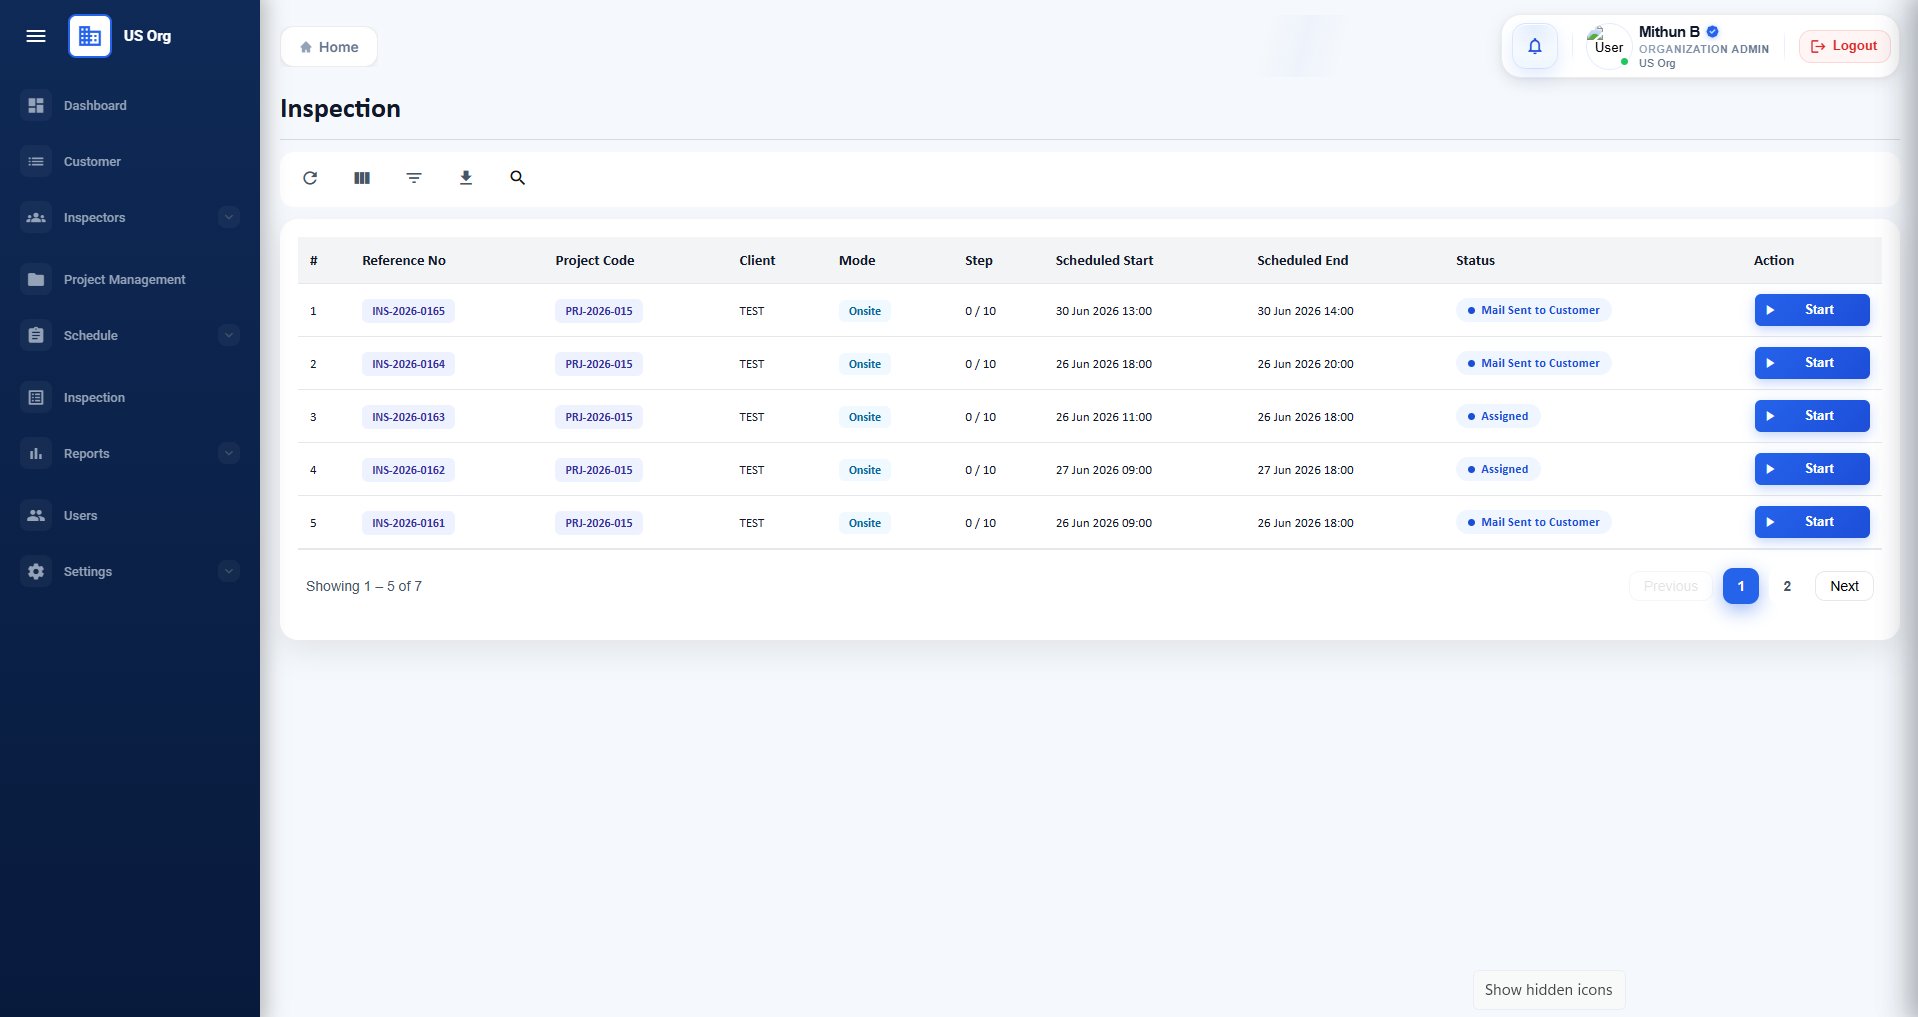
Find your inspection by reference number or project code. The Status column shows where each inspection stands (Assigned, Mail Sent to Customer, etc.). Click Start to begin.
After starting the inspection, the Inspection Units screen shows all units (equipment) associated with the project. Each unit card displays the unit name, device type, location, checklist type, and current status.
Click Start Inspection (or Resume Inspection if continuing) on the unit you want to inspect.
Inspection Units — select a unit
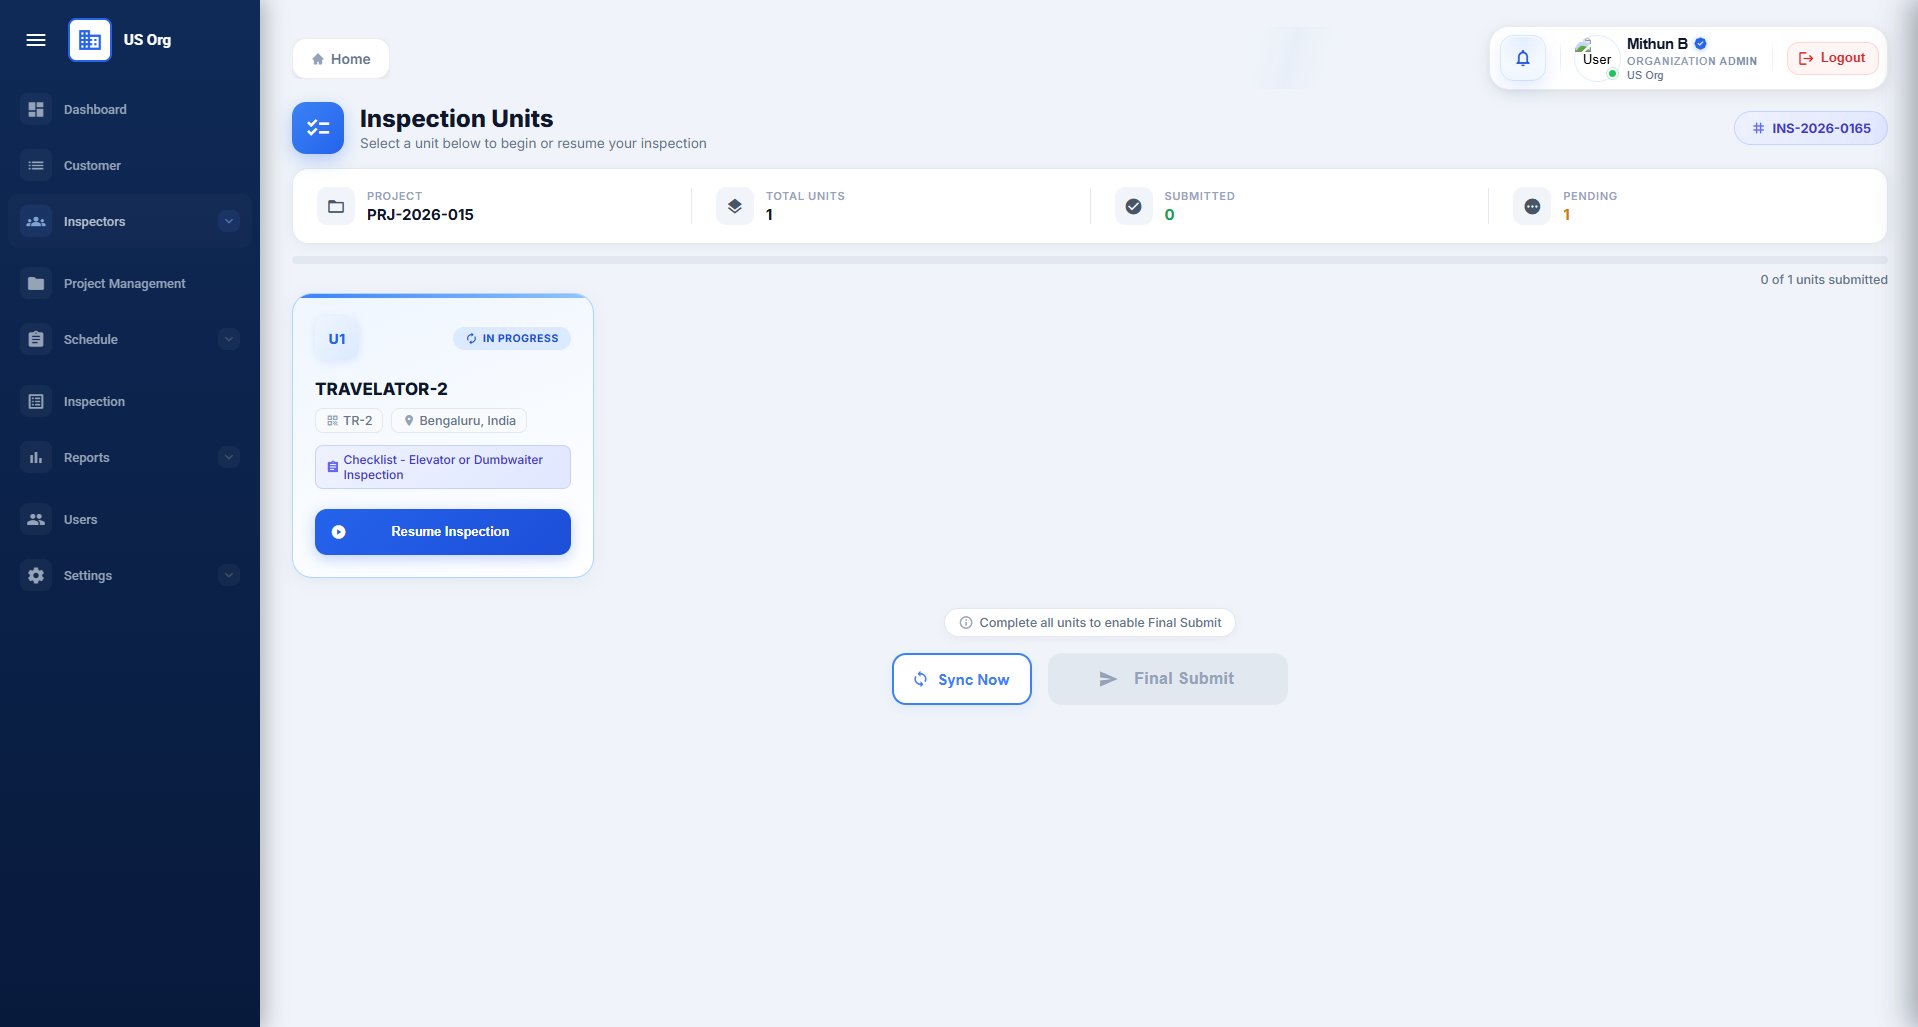
The unit card shows the device name, unit identifier, location, and the checklist type assigned (e.g. "Checklist - Elevator or Dumbwaiter Inspection"). A progress bar at the top tracks submitted vs. pending units.
Before the checklist begins, complete the Building & Unit Information form. This captures the physical details of the building and equipment that will appear on the final inspection report.
Building Info — top fields
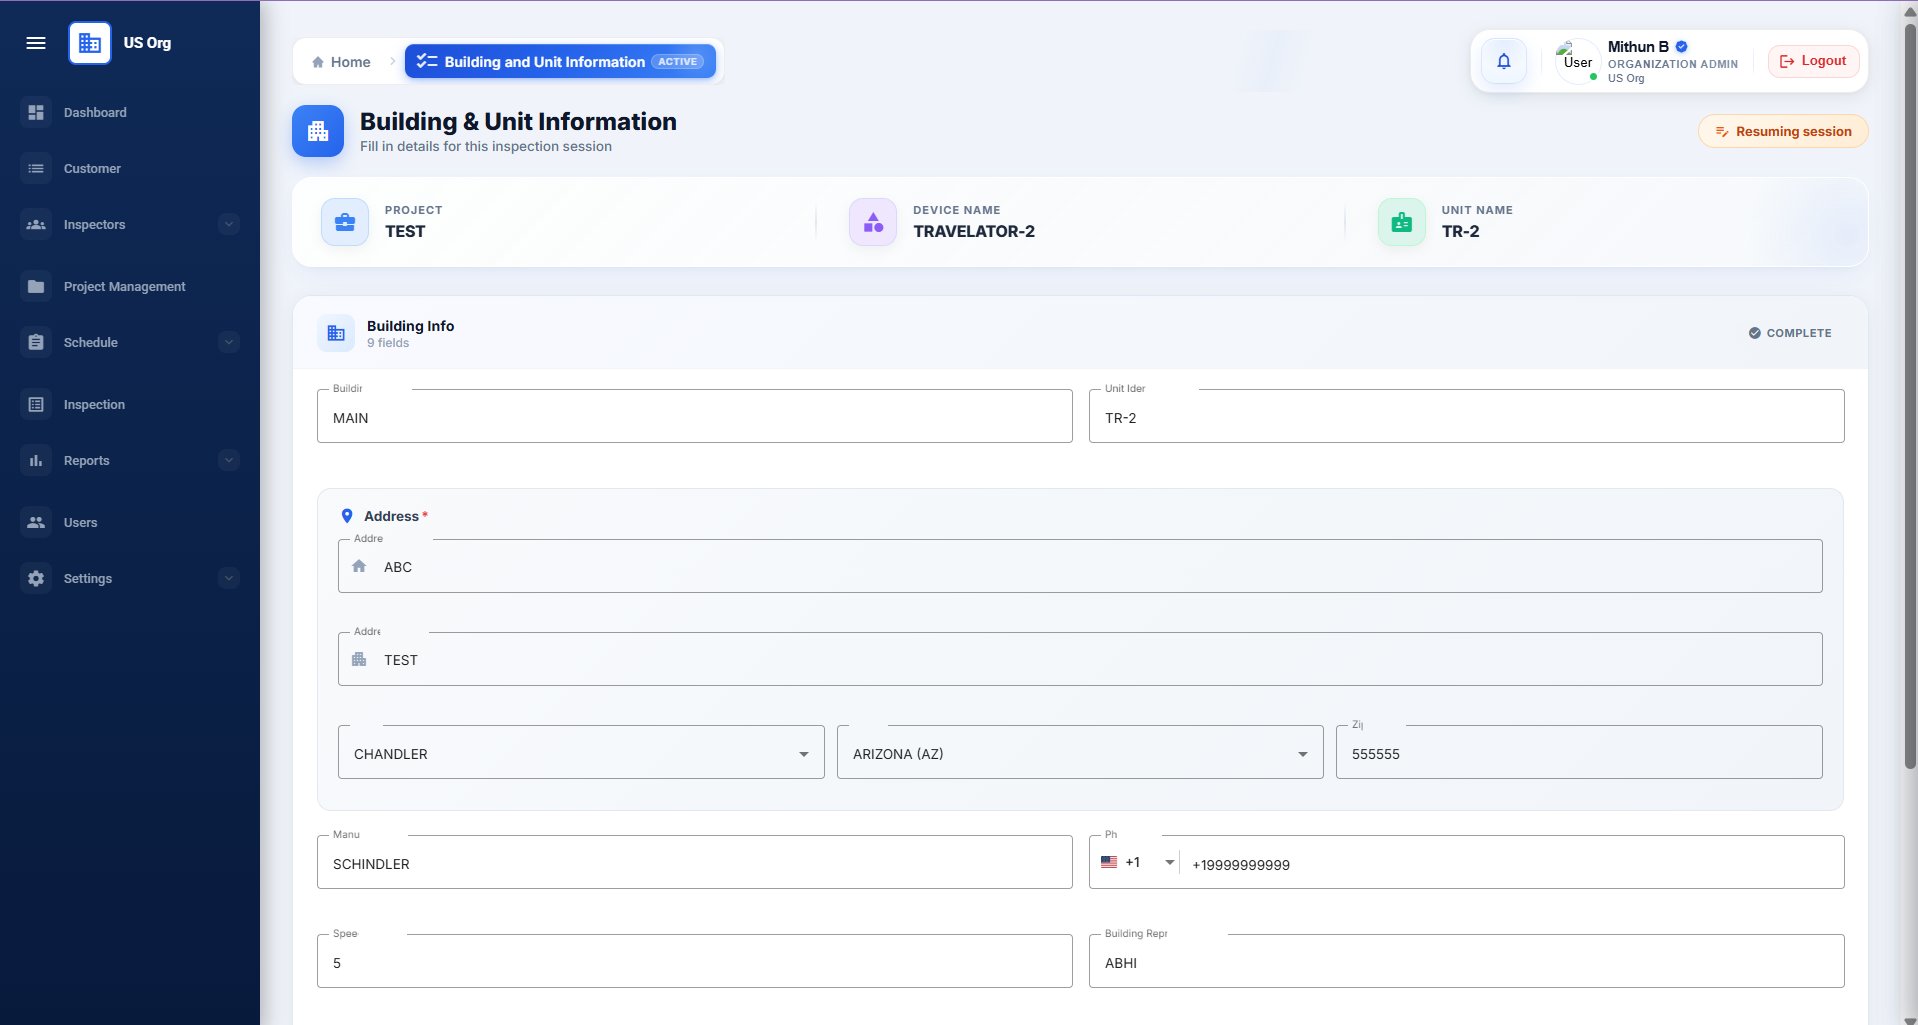
Enter the Building Name, Unit Identifier, street address, city, state, zip code, Manufacturer, phone number, speed (FPM), and Building Representative name.
Building Info — capacity and periodic date
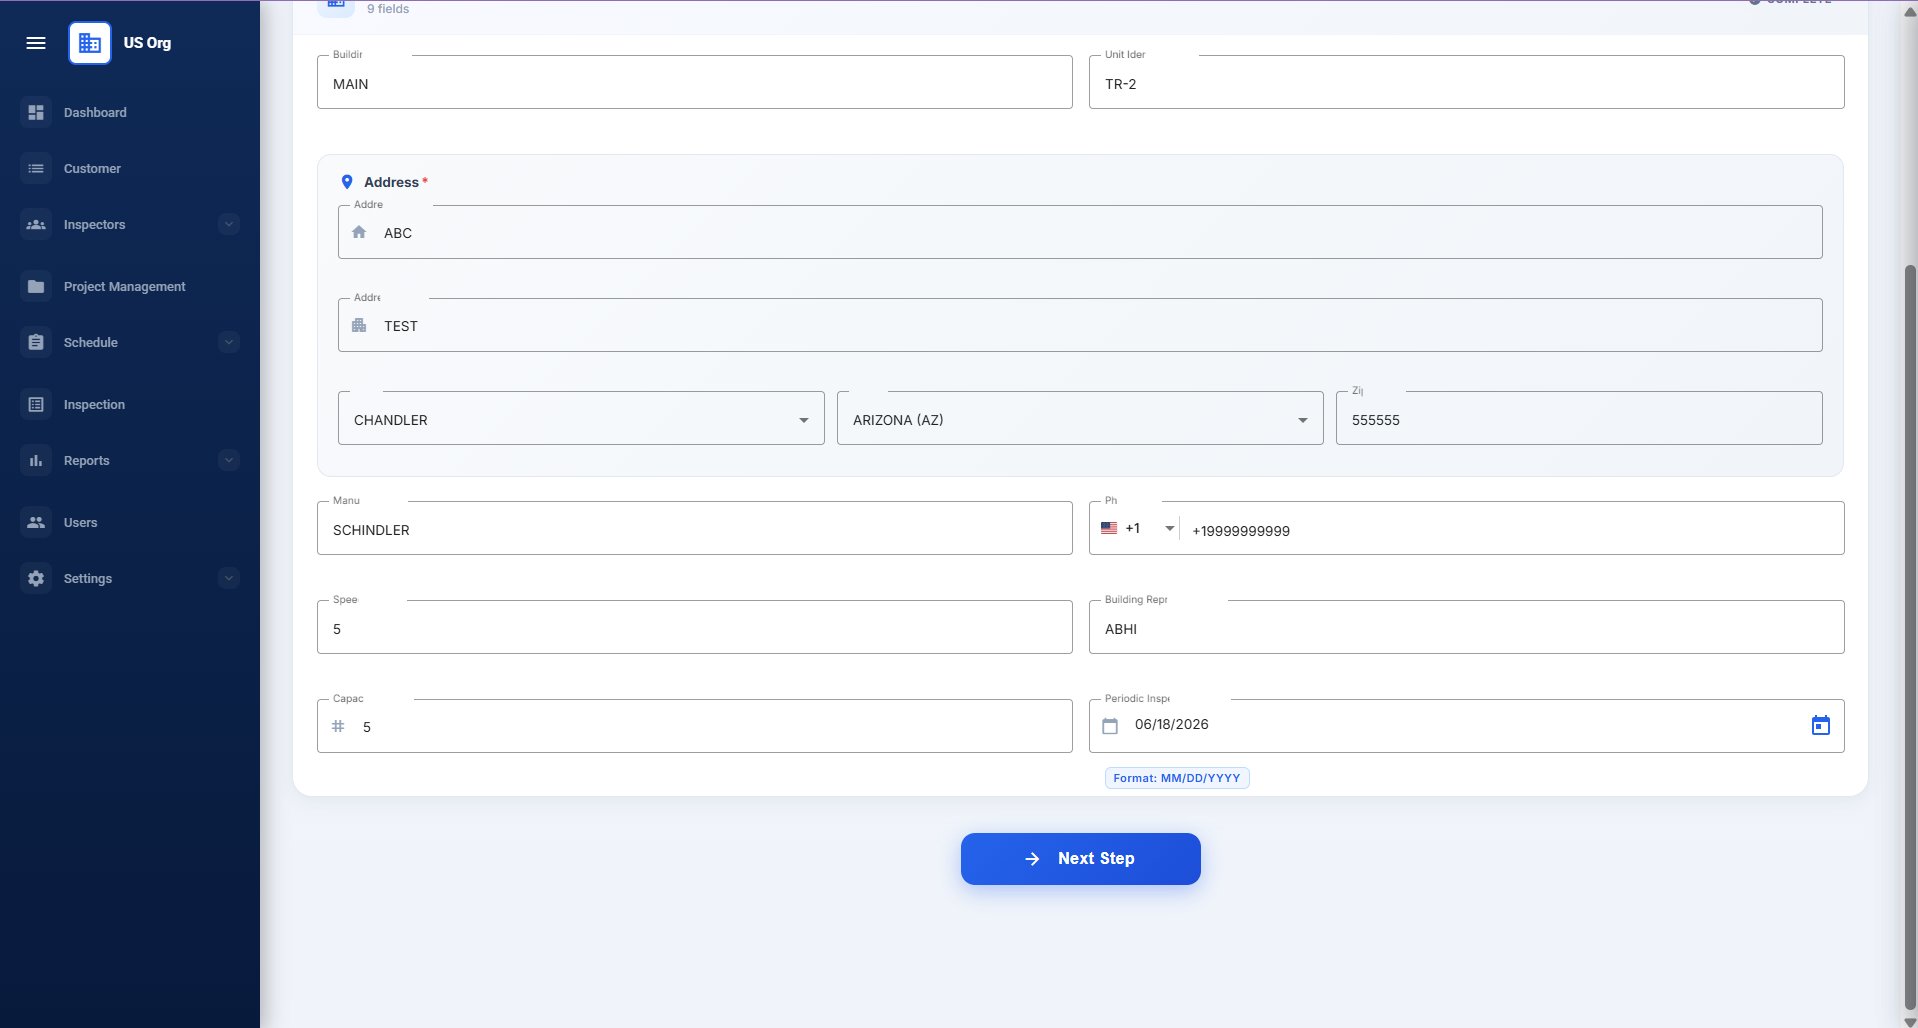
Enter the Capacity (lbs) and Periodic Inspection Date. Once all required fields are complete, click Next Step to proceed to the checklist.
The heart of the Inspection is the structured checklist. Each checklist is organized into tabbed sections (e.g. Elevator-Inside of Car, Machine Room, Top of Car, Outside Hoistway, Pit, Fire Service). Work through each tab and mark every item OK, NG (No Good), or NA (Not Applicable).
💡
Use Select for All at the top right to batch-mark all items in the current tab as OK, NG, or NA. You can still override individual items after using this shortcut.
ASME A17.1 checklist — Elevator Inside of Car tab
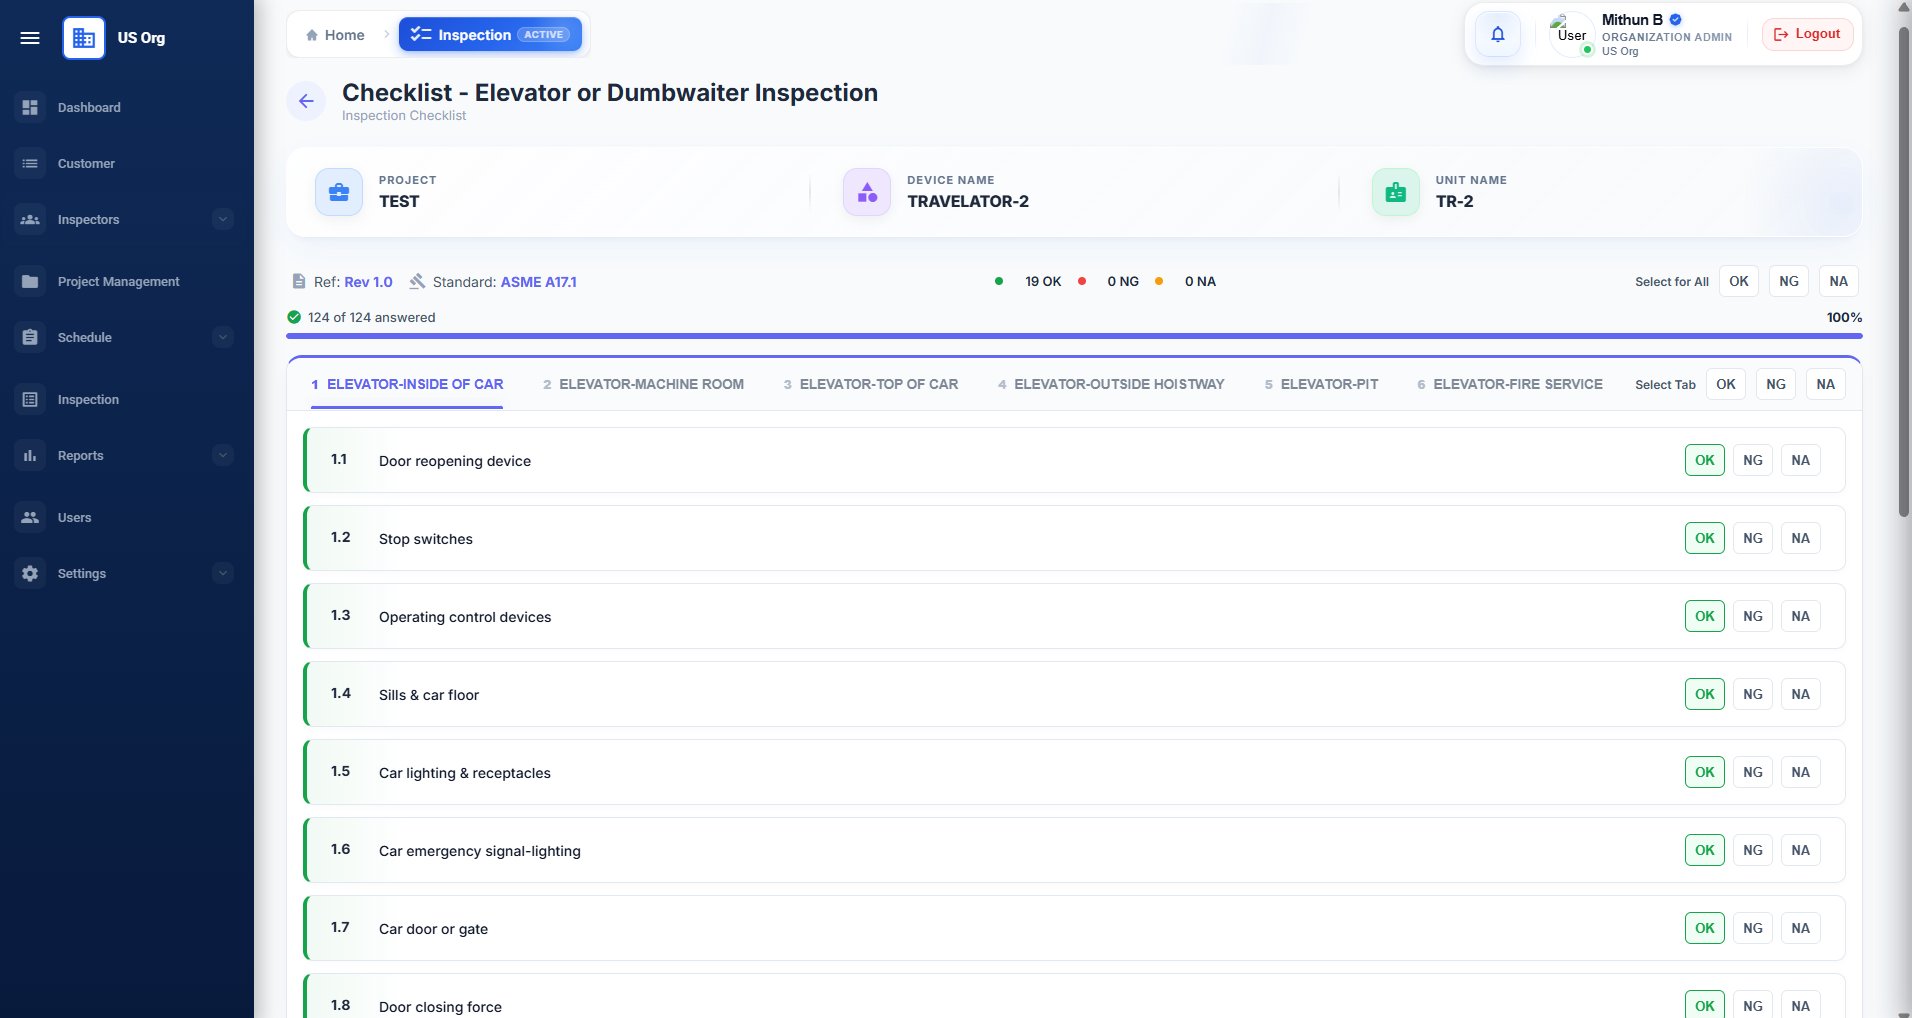
Each section is a tab at the top. The progress indicator shows items answered (e.g. 124 of 124 = 100%). Tap OK, NG, or NA for each numbered item. The green counter updates in real time.
After completing the checklist, the Inspector Sign-off screen collects your conclusions and credentials. Set the overall Inspection Result (Pass, Fail, or Permit Req'd), then complete the Inspector Information section with your certification details.
Inspector Sign-off — conclusions and inspector info
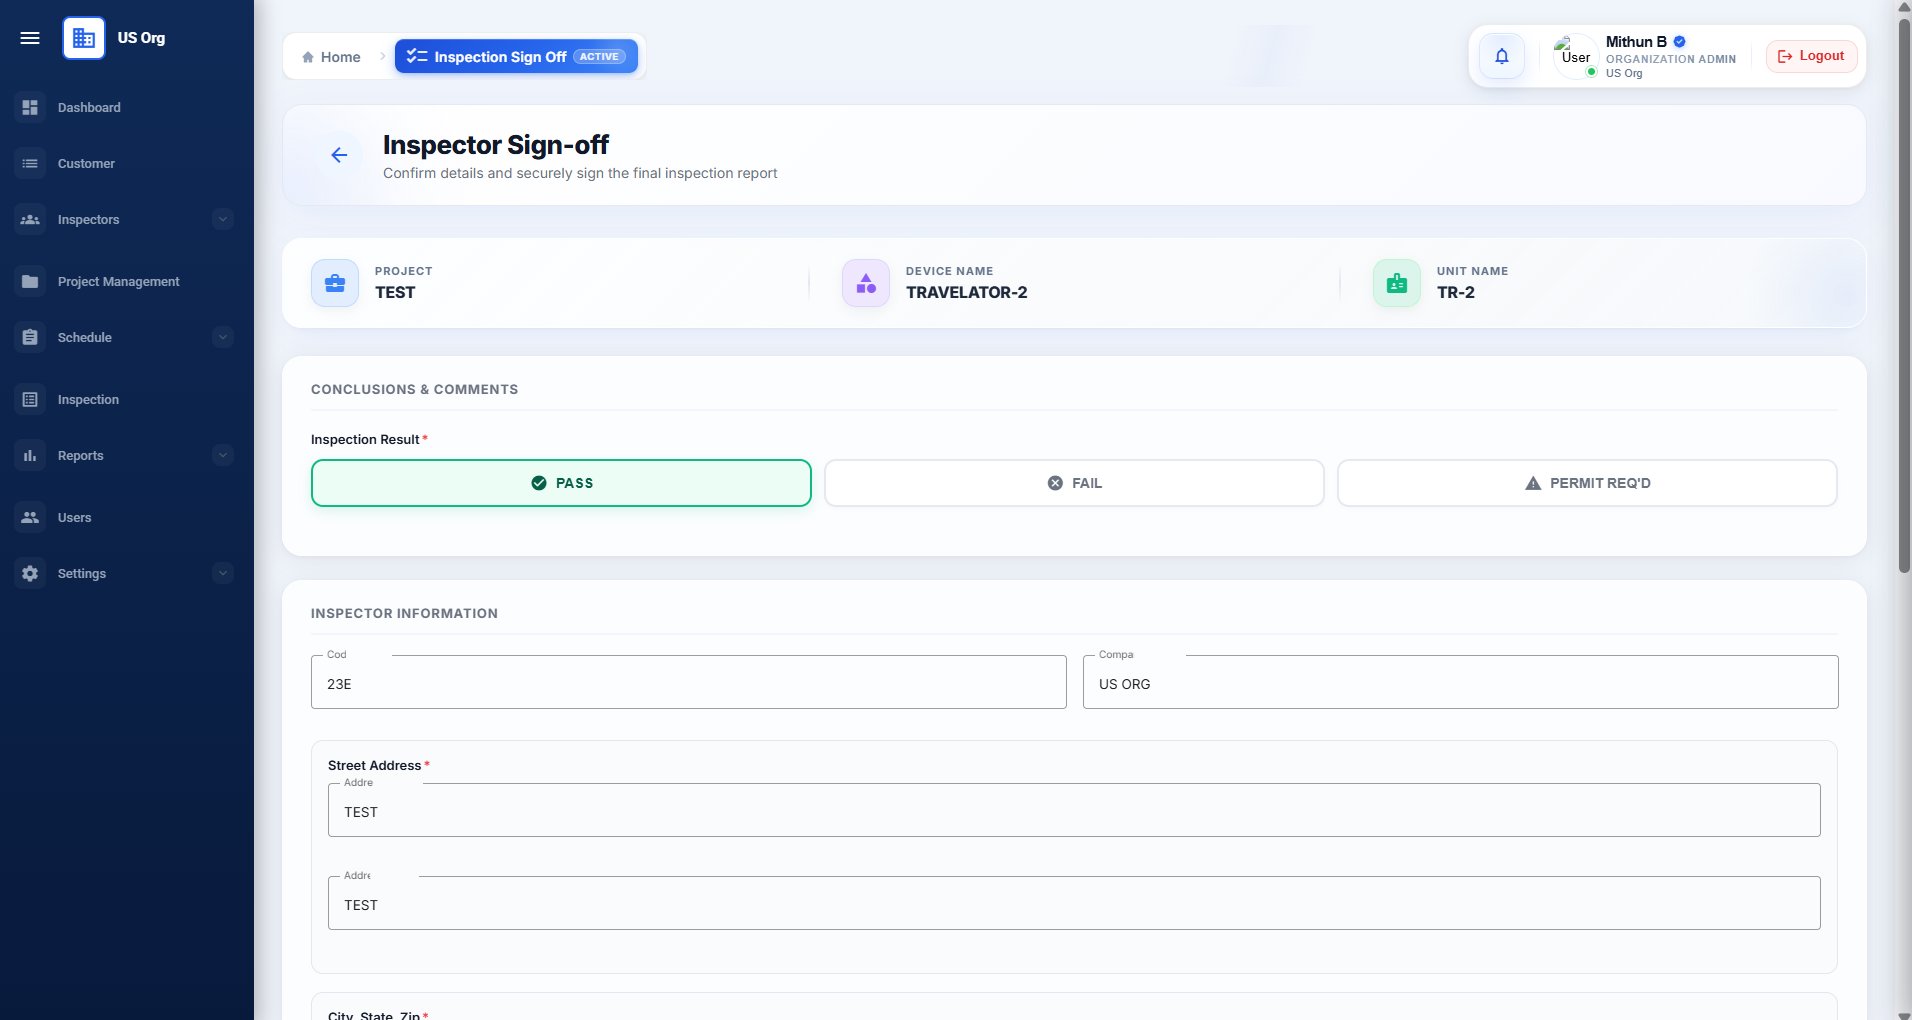
Select the Inspection Result — PASS is pre-selected if all items are OK. Enter your Code Edition, Company Name, and Street Address in the Inspector Information section.
Inspector Sign-off — signature and certification
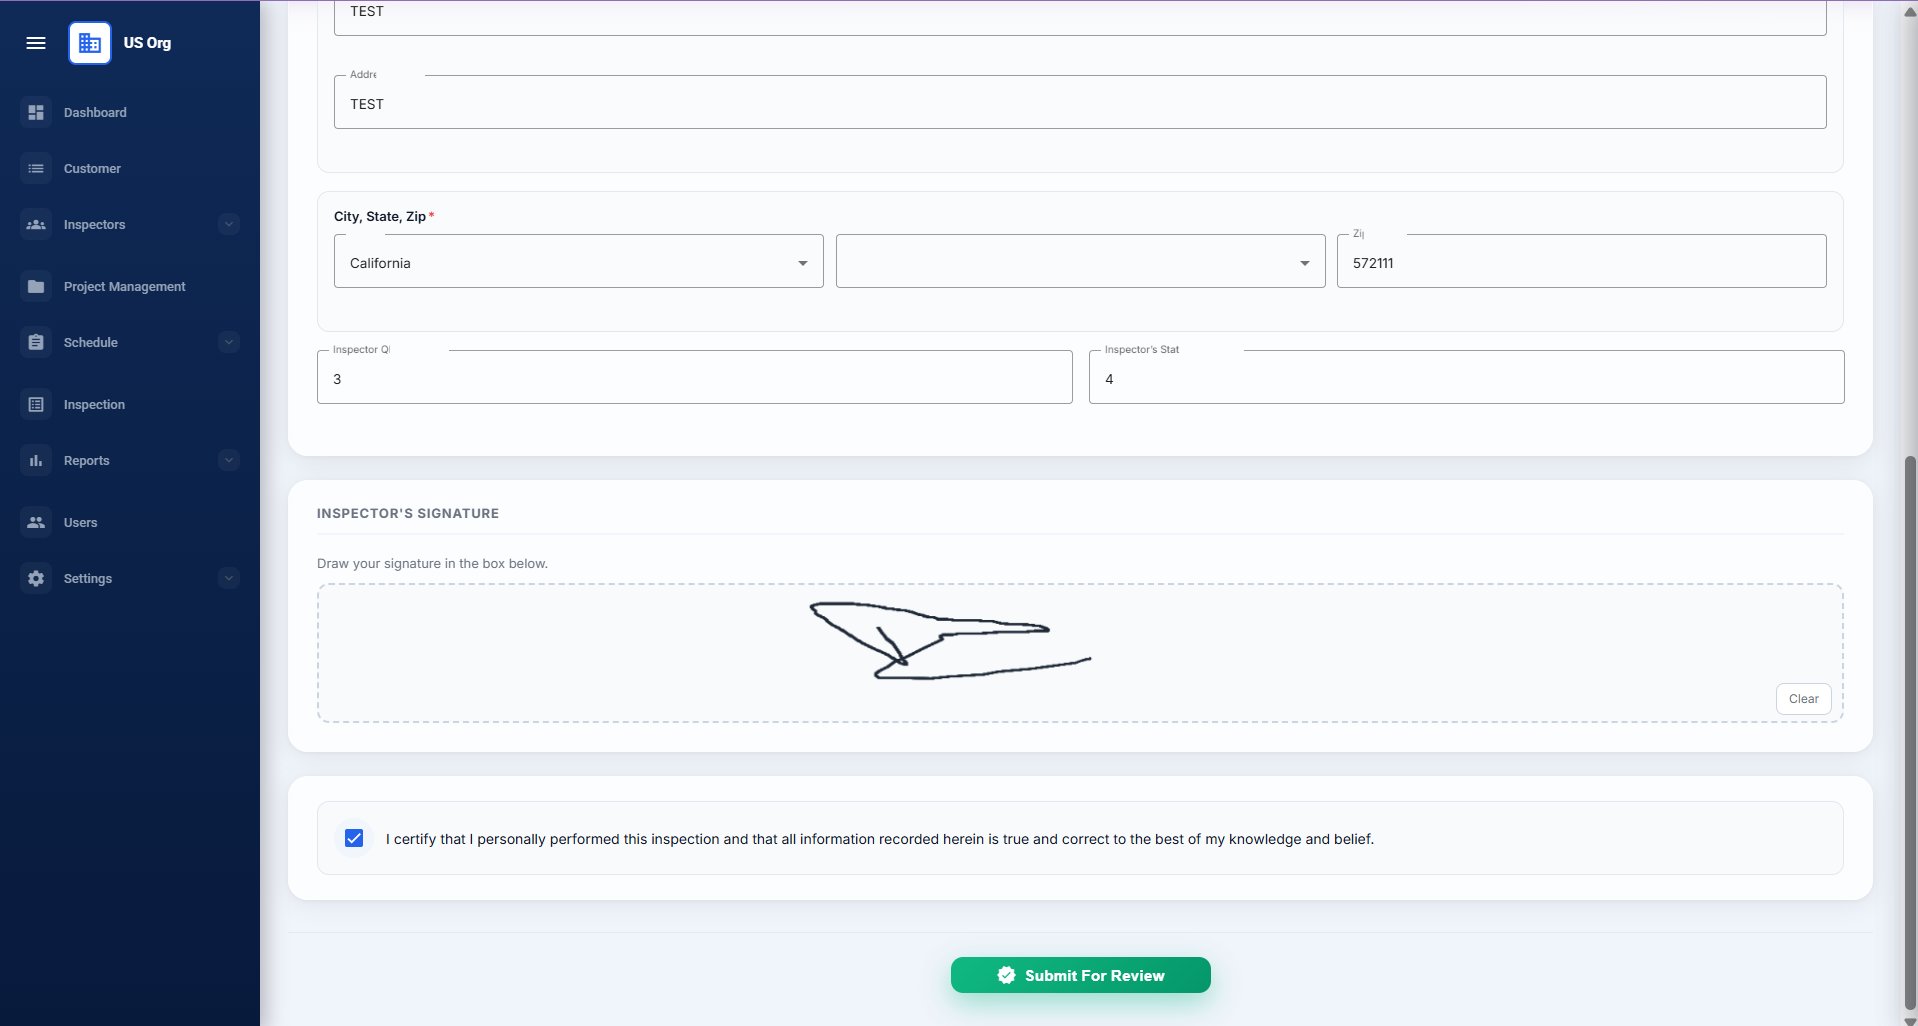
Complete the City, State, Zip, Inspector QEI Number, and State License Number. Draw your signature in the signature box. Check the certification statement and click Submit For Review.
Before final submission, review the Inspection Report Summary. This shows the Building & Unit Details and the full checklist results in a report format. Verify all information is correct before submitting.
Inspection Report Summary — building details and checklist
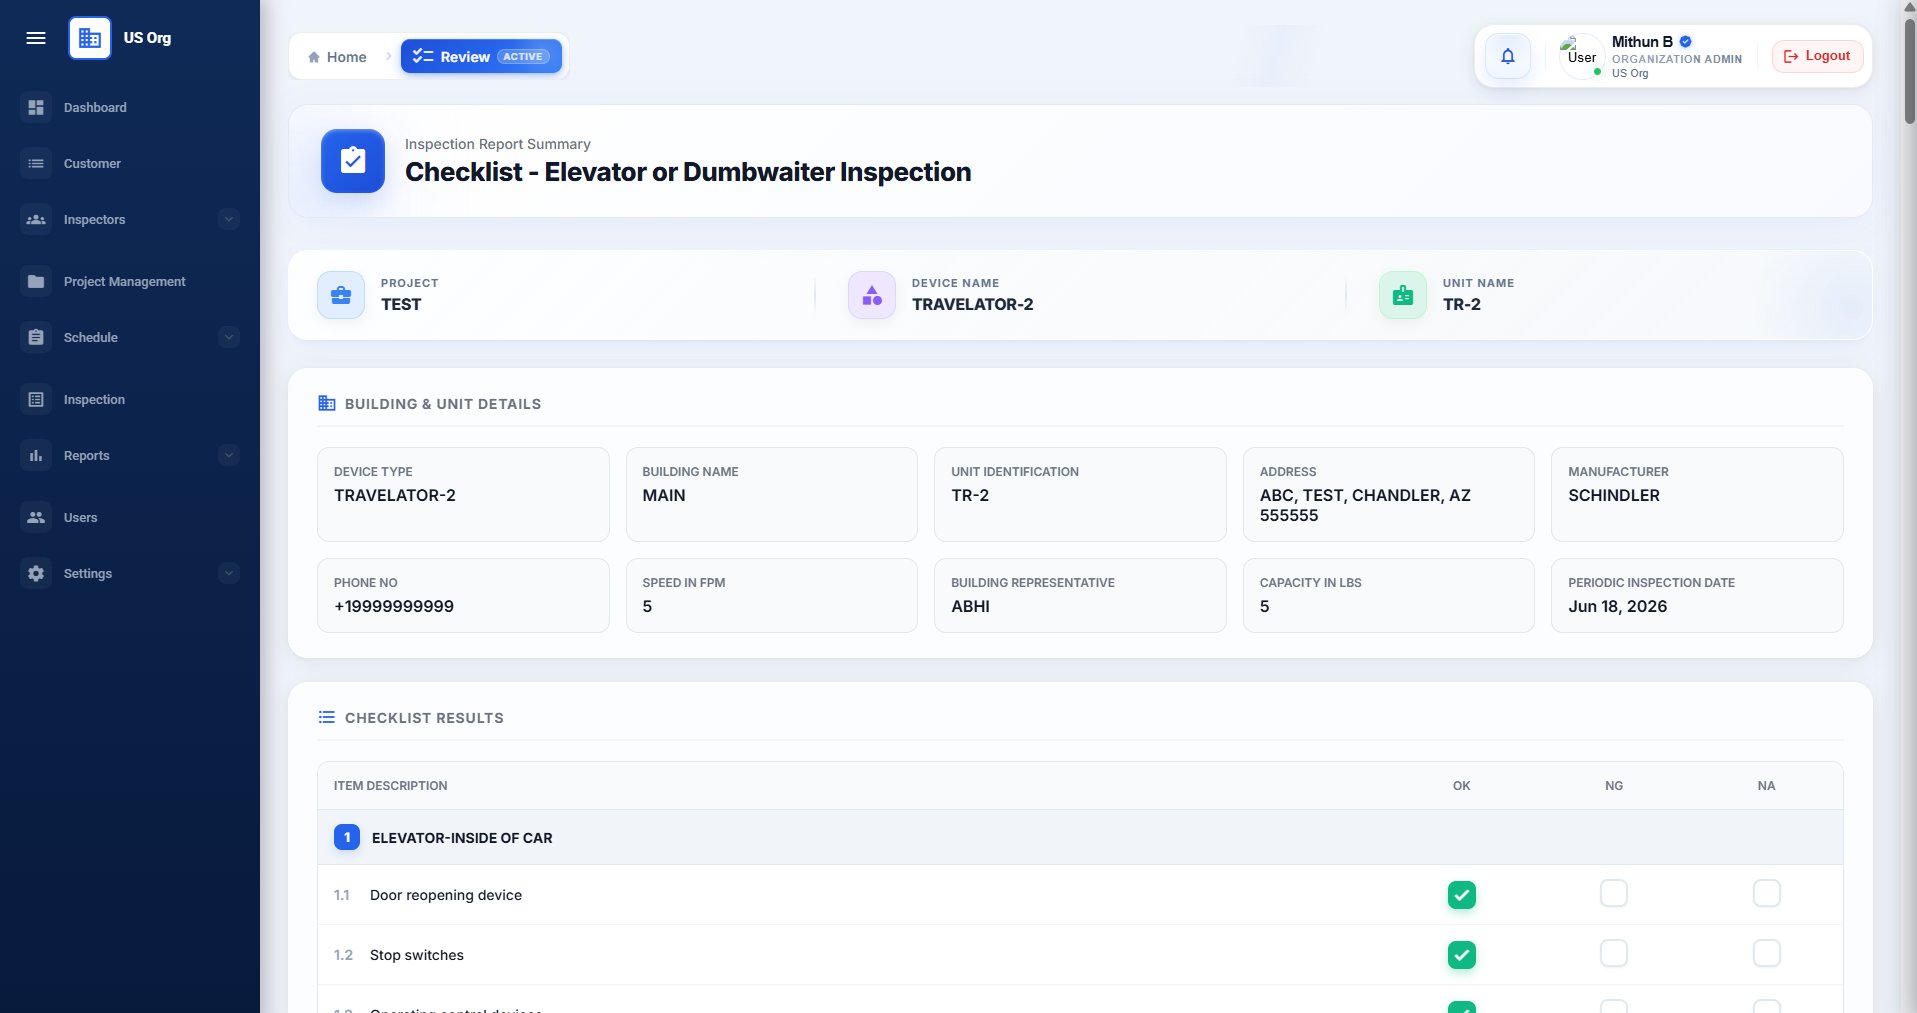
Review the Building & Unit Details (device type, building name, address, manufacturer, speed, capacity, periodic date) and the Checklist Results section with OK/NG/NA status for every item.
Final Conclusion and Authorization
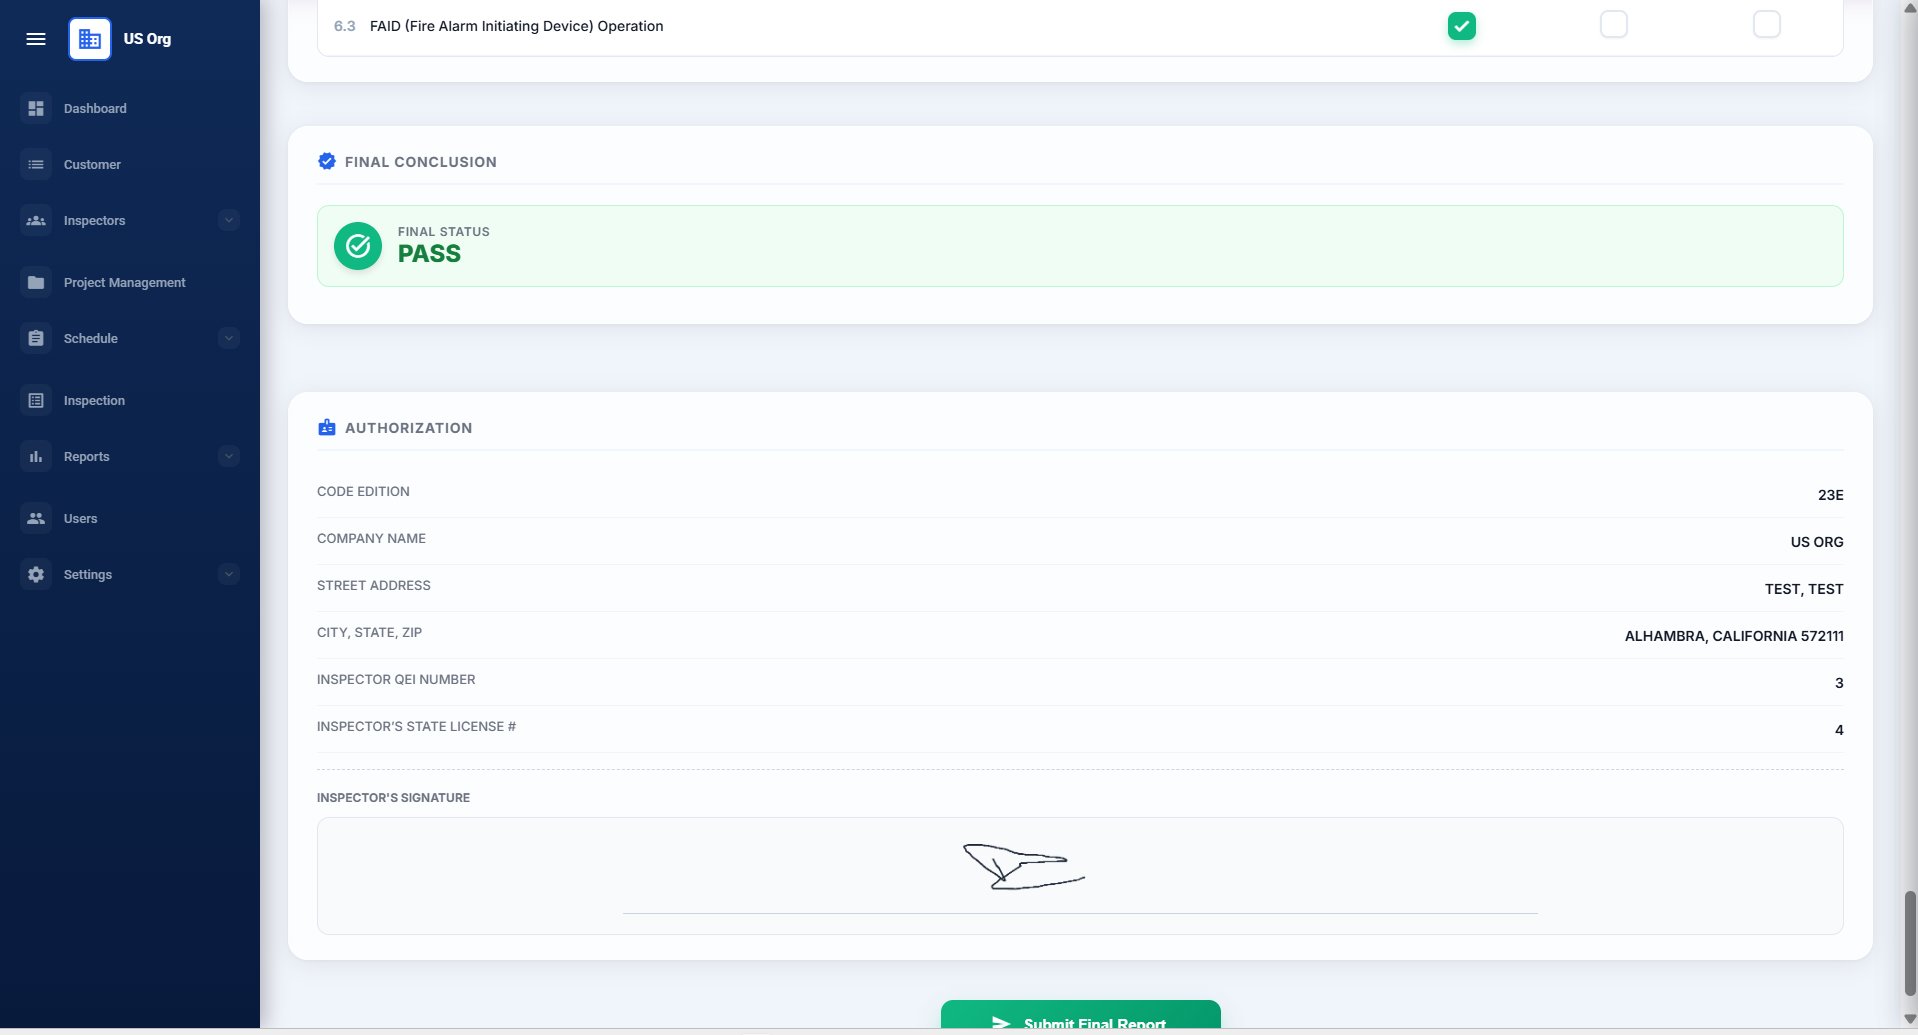
Scroll to the bottom to see the Final Conclusion (PASS/FAIL) and the Authorization section with your credentials and signature. Click Submit Final Report once satisfied.
After submitting the unit, the Inspection Units screen updates to show the unit as Submitted. Once all units in the project are submitted, click Final Submit to complete the inspection. You can then download or view the official PDF report.
Inspection Units — unit submitted
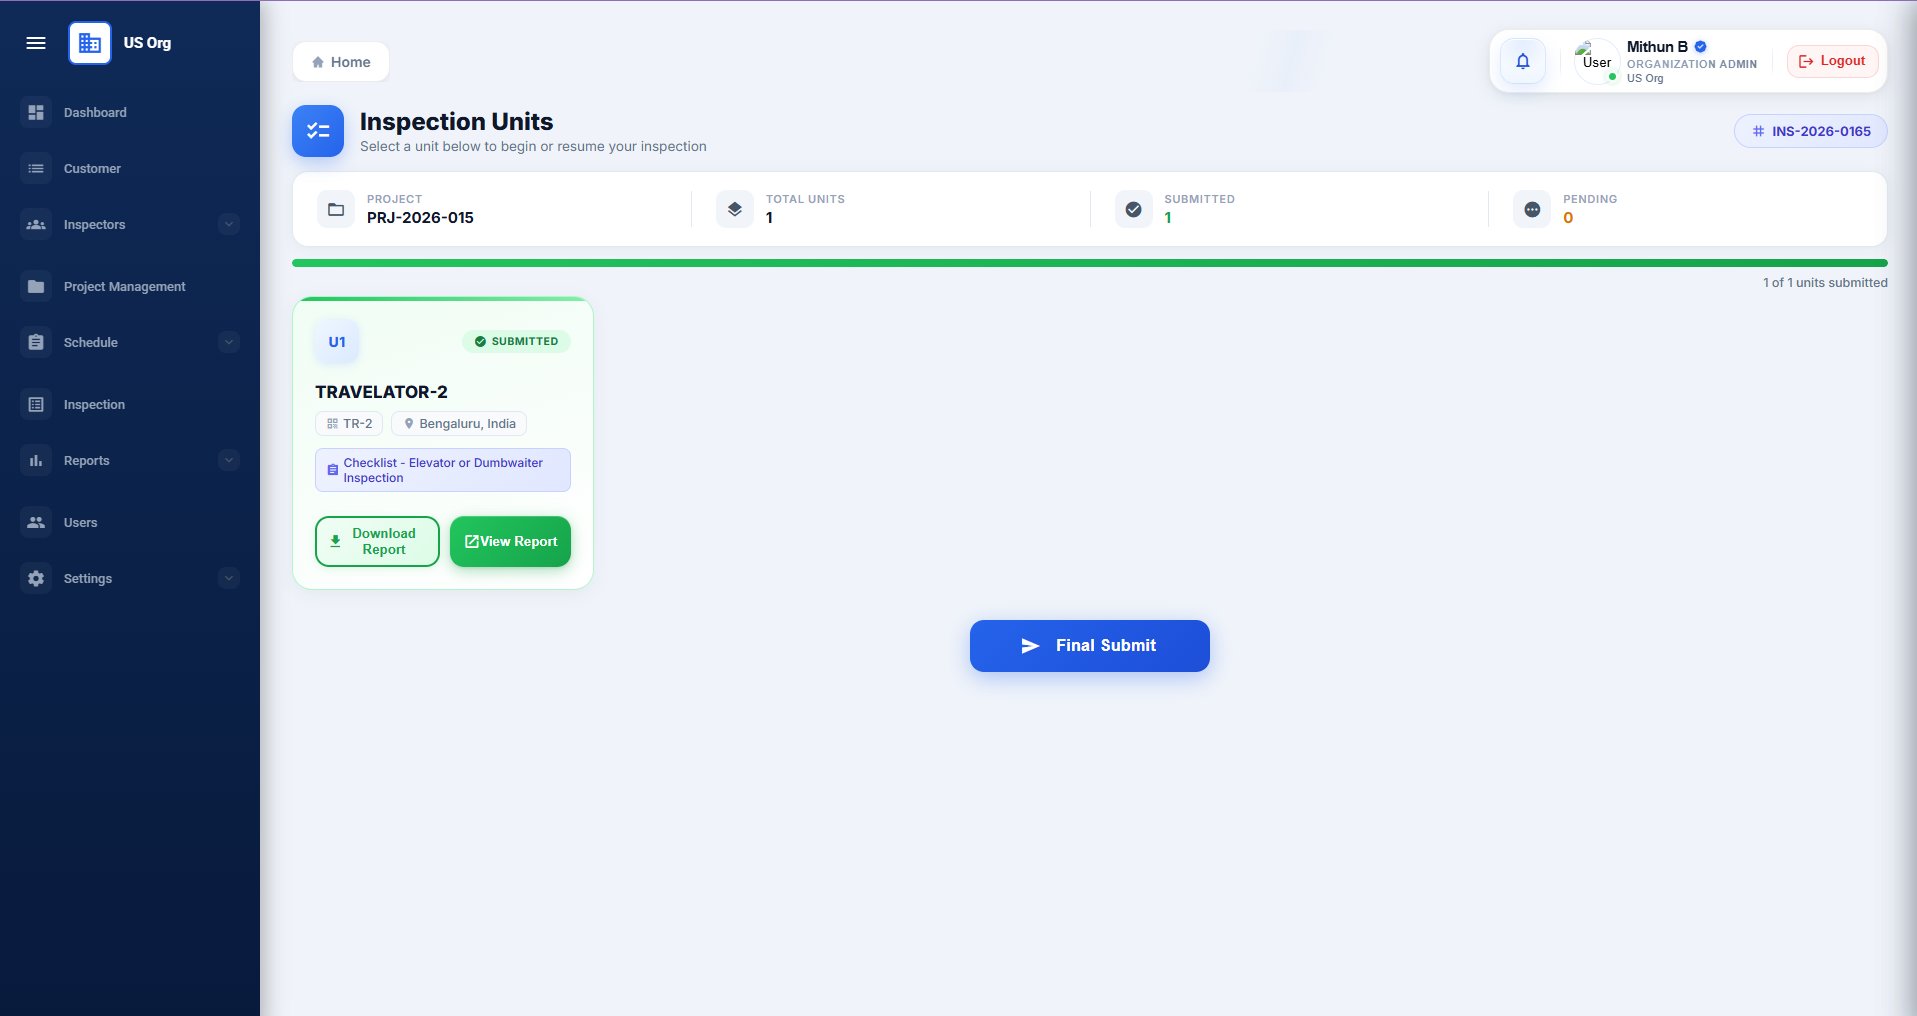
The unit card now shows SUBMITTED (green badge). The progress bar turns full green. Use Download Report or View Report to access the completed report. Click Final Submit to send to admin review.
Final PDF report — City of Chicago Department of Buildings
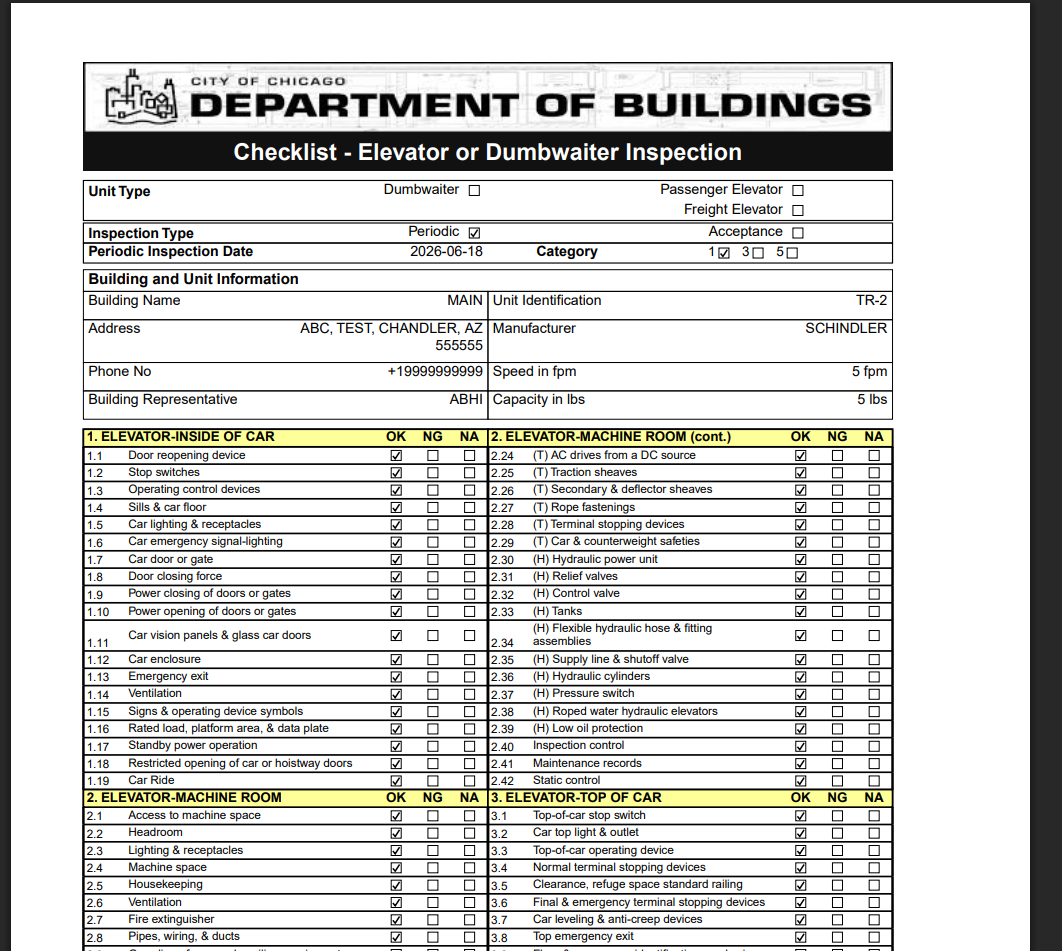
The downloaded report is a formatted PDF containing the official inspection checklist, all building and unit details, your credentials, and your signature — ready for submission to the authority having jurisdiction (AHJ).
✅
The inspection is now complete. The report has been submitted for administrative review and the official PDF is available for download and submission to the relevant authority.